

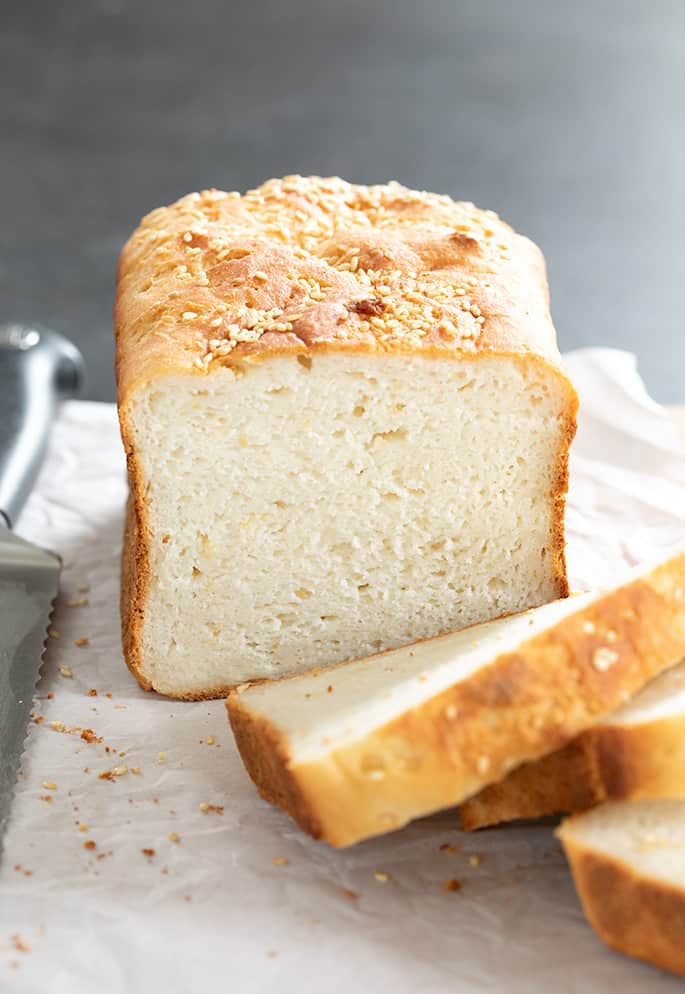
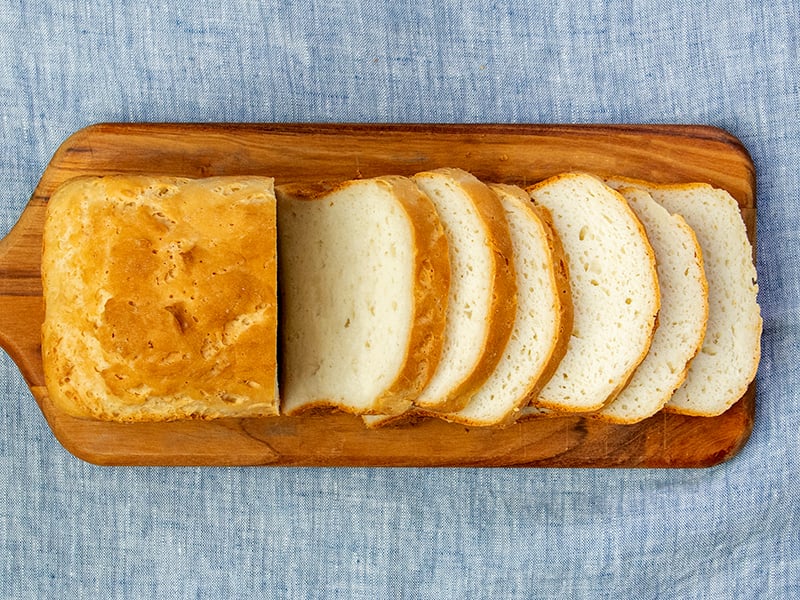
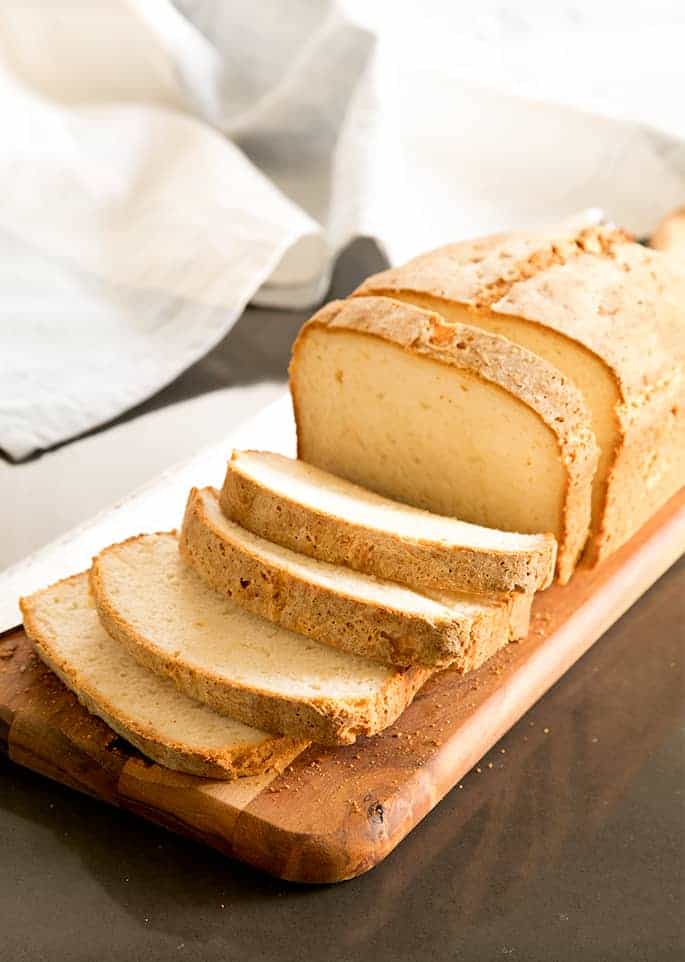
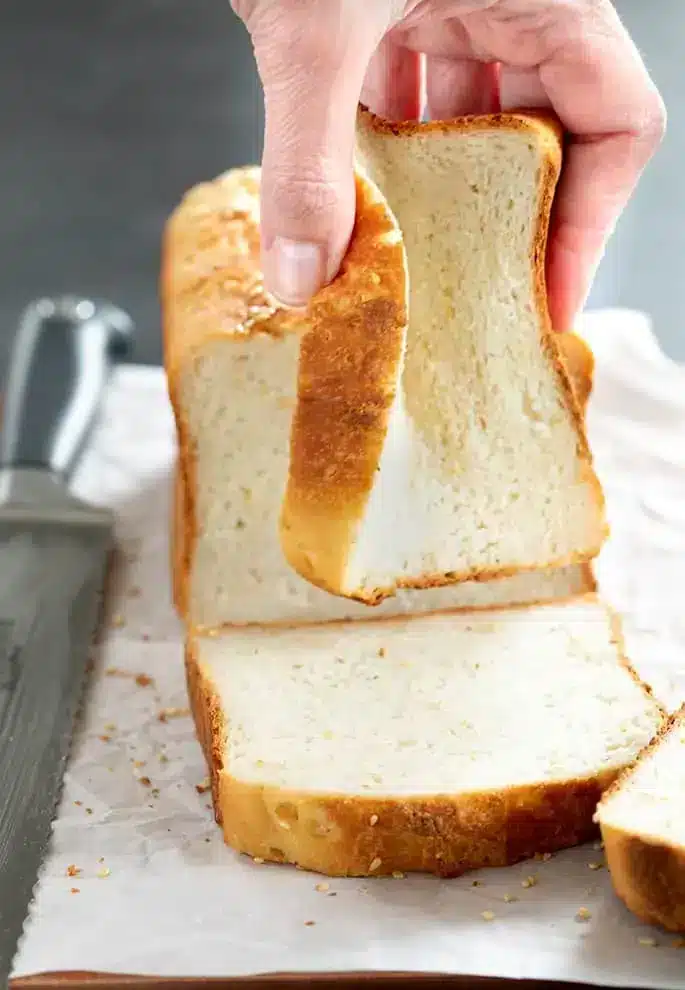
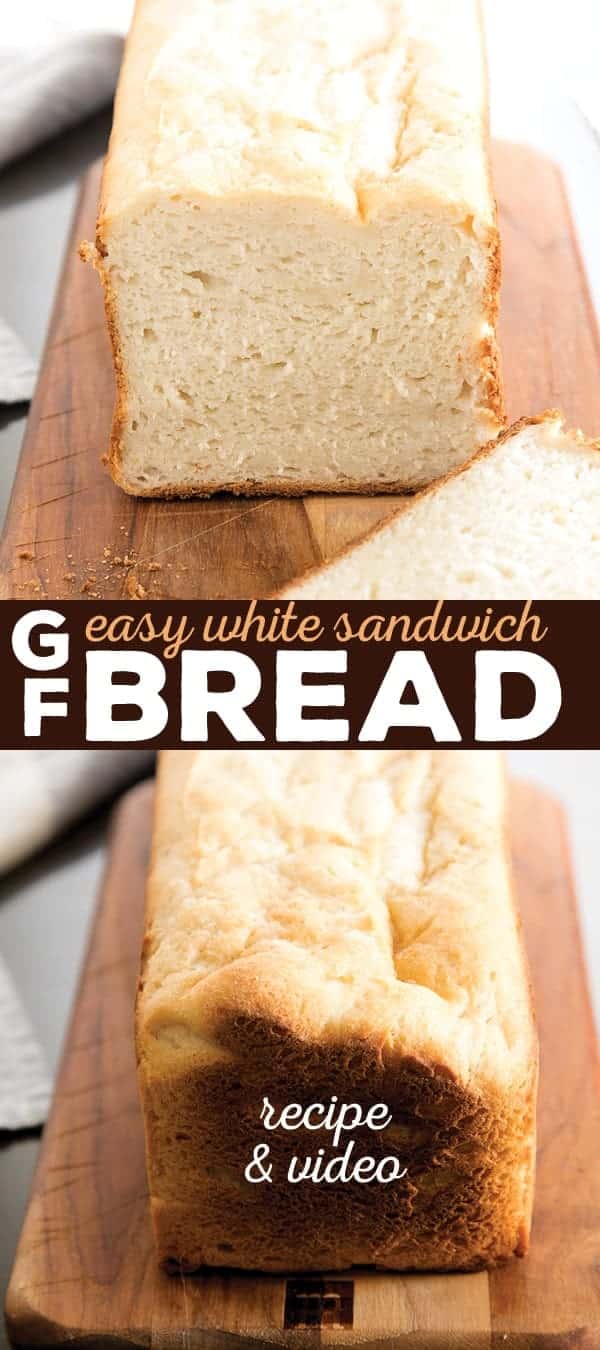
With a delicate and tender crumb, this simple white gluten free bread recipe is the unique and greatest, made in simply 4 simple steps. It bends and squishes, tastes just like the “actual factor”, and has a stupendous bakery-style crust.
That is the bread that readers make each week for college lunches, and that bakery house owners have instructed me they promote to clients of their gluten free bakeries!
4 Simple Steps To Gluten Free Bread
This recipe is as simple as mixing the components, beating them till easy, letting the loaf rise, and baking it. It requires a stand mixer fitted with the paddle attachment to make a easy, cohesive dough that rises cleanly and evenly.
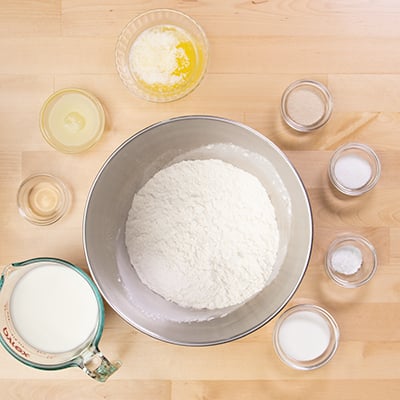
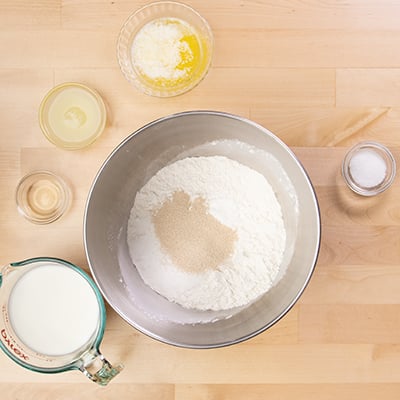
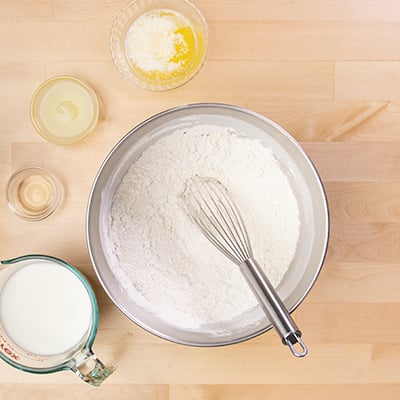
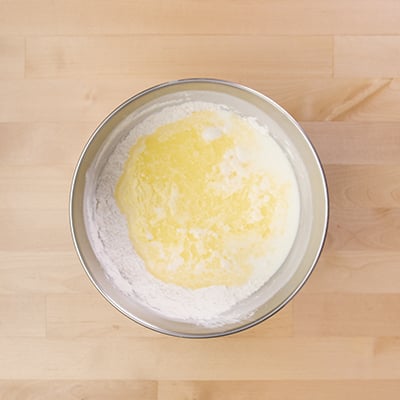
1. Mix the dry components, then add moist.
Whisk collectively the dry components besides the salt (gluten free flour, xanthan gum, prompt yeast, cream of tartar, and sugar), then whisk within the salt. Add all of the moist components (heat milk, melted butter, apple cider vinegar, and egg whites) to the bowl.
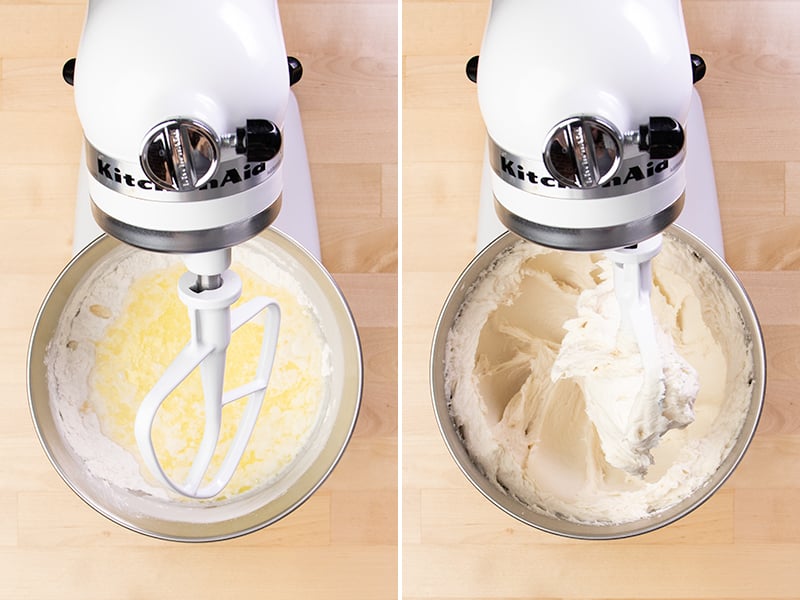
2. Beat the dough nicely.
Beat all the things with the paddle attachment till the dough begins to look fluffy and whipped in look. It will likely be like a thick batter, not one thing you possibly can knead along with your palms.
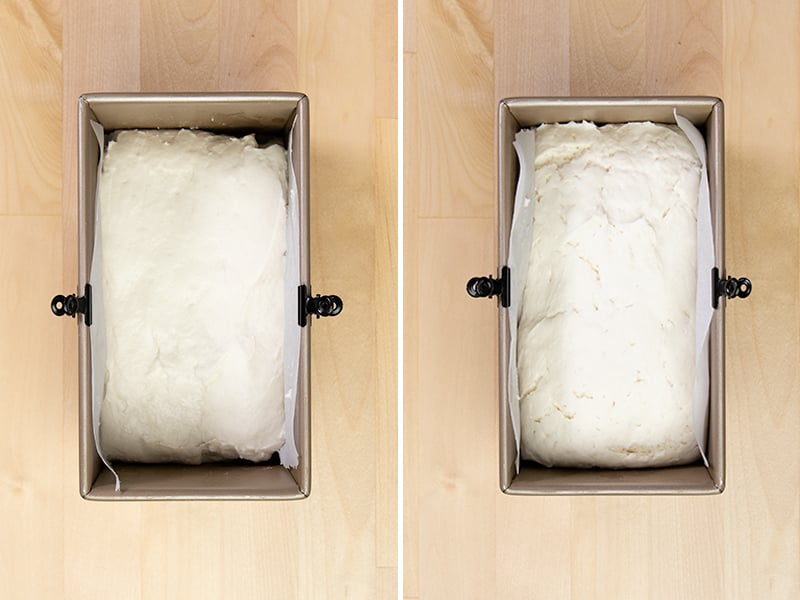
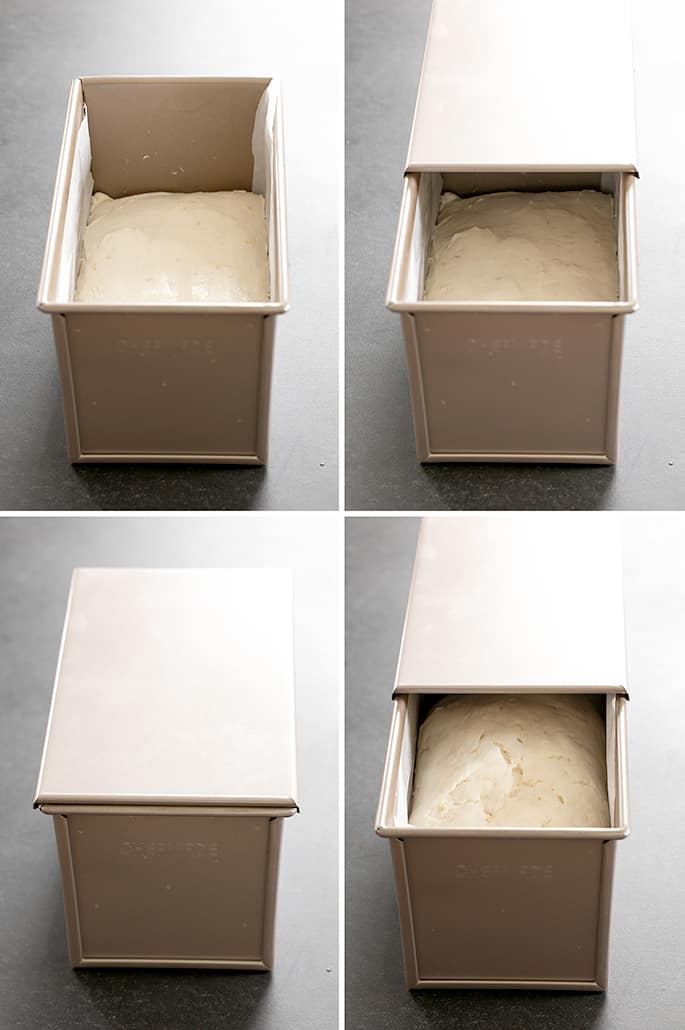
3. Let the dough rise, then bake.
Switch the uncooked dough to a greased ready loaf pan, and easy the highest. Cowl with plastic wrap and let it rise till it is about 50% greater than the way it began (it will not double). Bake on the center rack OR high oven rack (no matter is acceptable in your oven) for about 50 minutes at 375°F till it the inner temp is about 205°F.
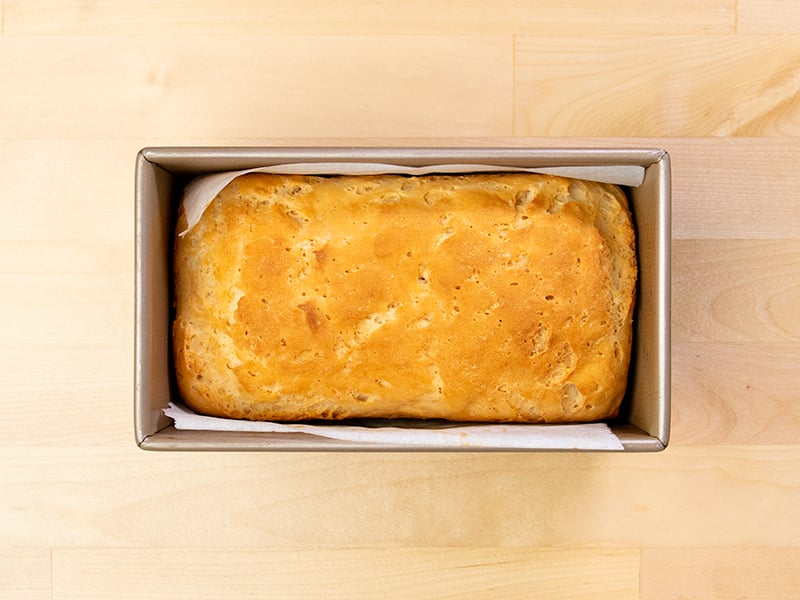
4. Let cool, slice and revel in!
Let the loaf of bread sit briefly within the pan, then place it on a wire rack to complete cooling. When you do not let it cool fully, you will squish the bread as you slice it and you will not get clear slices. So attempt to be affected person!
Ingredient substitutions
Dairy free
Exchange the butter with block-style vegan butter. Soften and Miyoko’s Kitchen manufacturers are my favourite.
You’ll be able to even use Earth Steadiness Buttery Sticks and cut back the salt to 1 teaspoon, however understand that it has extra moisture than butter, so our loaf could sink just a little because it cools.
Use your favourite unsweetened, unflavored dairy free milk that seems just like cow’s milk. Canned coconut milk is simply too thick, however the carton type ought to work high-quality.
Egg free
Strive one “chia egg” (1 tablespoon floor chia seeds + 1 tablespoon lukewarm water, combined and allowed to gel) instead of the two egg whites or aquafaba. Some readers have had success utilizing 1 egg’s price of Bob’s Purple Mill egg replacer.
Xanthan gum-free
To attempt changing xanthan gum with psyllium husk, I might advocate utilizing 20 grams of psyllium husk powder.
Prompt yeast
This recipe calls for immediate yeast (additionally known as speedy rise or breadmaker yeast), which you add with out soaking first. To make use of energetic dry yeast as a substitute, you want 1.25 instances extra, for a complete of 10 grams (about 3 teaspoons). Soak it first in among the milk till it foams, after which add it once you add the remainder of the milk.
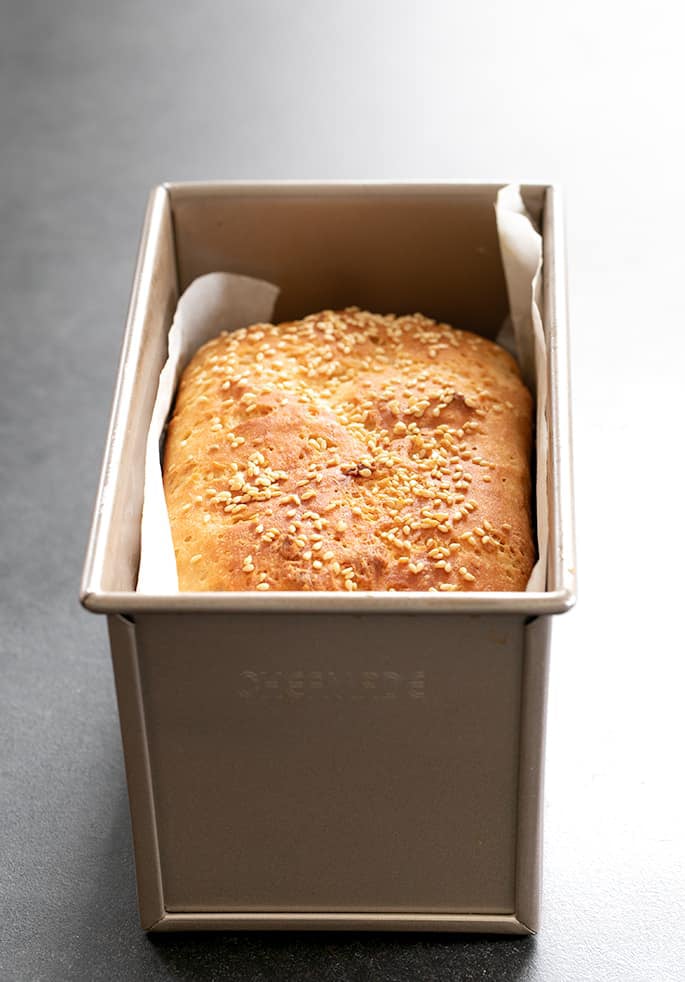
Including seeds
For some taste and crunch, sprinkle the highest of the risen bread dough with seeds. Add sesame, chia, quinoa, sunflower, or pumpkin seeds, and perhaps even some finely chopped nuts.
4 guidelines for gluten free bread baking
Rule # 1: Observe the recipe as written: If in any respect potential, keep away from ingredient substitutions at first, Some may go, however many won’t. And early failure will make it very onerous to remain motivated.
Rule # 2: Measure components by weight: Quantity measurements (cups) for dry components like flour are inherently unreliable, as human error is unavoidable and quantity measuring containers fluctuate in dimension. A easy digital kitchen scale is reasonable, and simple to make use of. After which ignore the quantity measurements!
Rule #3: Be affected person throughout rising: Yeast rises extra slowly in cooler temperatures, however will nonetheless rise. Overproofing means an excessive amount of rise, however not too lengthy an increase. In a heat, moist surroundings, your yeast bread will rise extra rapidly. And ensure your bread is roofed throughout rising so it would not dry out, which might forestall rising.
Rule # 4: Use an oven thermometer: Most ovens run sizzling (mine included), typically by about 50°F. Use a easy, low cost oven thermometer to gauge your oven’s baking temperature correctly, and change it typically. If you bake in a too-hot oven, the surface will get overbaked earlier than the within has an opportunity to develop sufficient construction to assist it. The bread will then collapse on itself because it cools.
My Professional Tip
Skilled suggestions
Strive a Pullman loaf pan
A Pullman loaf pan is a slender pan with excessive sides and often a lid. That is the way you bake a loaf of excellent sq. slices and no dome on high.
You may make a single loaf in a 1-pound Pullman loaf pan or an extended loaf with double the components in a 2-pound pan.
For the 1-pound pan, grease and/or line the lid with plastic wrap and canopy it through the rise. Then bake for about 40 minutes with the lid on, take away the lid and end baking till accomplished.
For the 2-pound Pullman pan
For the 2-pound loaf pan, double the recipe and make sure you combine the components with a bit of additional care. The directions are the identical as for the 1-pound pan for rising and baking, simply baked in a 2 pound Pullman loaf pan.
Do not let the bread cool fully within the pan
Let freshly baked bread cool within the pan for about 10 minutes, then switch it to a cooling rack and take away any paper liner so cool air circulates all the best way across the bread. In any other case, the crust can get soggy from trapped steam.
Use a serrated knife
Use some type of serrated knife for slicing. In any other case, you might squish or tear your bread. And let it cool earlier than you slice it or it will not slice cleanly.
-
Stand mixer fitted with paddle attachment (See Recipe Notes)
Stop your display screen from going darkish
-
Grease or line a 9-inch x 5-inch loaf pan, or a 1-pound Pullman-style loaf pan (with a lid) and set it apart. You too can line the underside and sides of the pan with a chunk of parchment paper.
-
Within the bowl of a stand mixer fitted with the paddle attachment, place the flour mix, xanthan gum, prompt yeast, cream of tartar and sugar. Whisk along with a separate, handheld whisk. Add the salt, and whisk once more to mix.
-
Add the milk, butter, vinegar and egg whites, and blend with the paddle attachment on low pace. Scrape down the edges of the mixer bowl as crucial throughout mixing.
-
Flip the mixer to medium-high pace and blend for about 3 minutes. The dough can be thick, easy and fairly moist, and will turn into barely whipped in look.
-
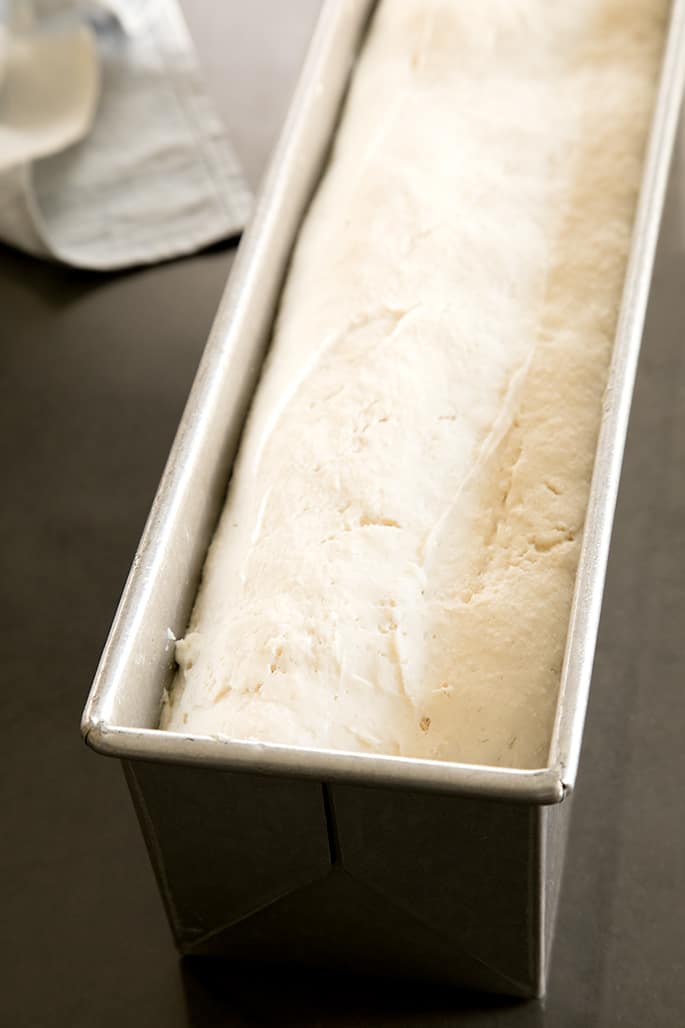
Scrape the dough into the ready loaf pan. Utilizing a moist spatula, easy the highest.
-
Cowl the dough with evenly oiled plastic wrap (and the lid of a pullman pan on high if utilizing), and permit it to rise in a heat, draft-free place for 30 to 45 minutes or till it’s about 150% of its authentic dimension. That signifies that it is about 50% greater than when it began (it will not double).
-
The dough could take longer to rise correctly in colder, drier climate and fewer time in hotter, extra humid climate. Be affected person!
-
When the dough has practically reached the top of its rise, preheat the oven to 375°F. The dough is beginning to overproof if the highest of the loaf begins to interrupt and craters begin to seem.
-
Take away the lid if utilizing, and the plastic wrap. Utilizing a pointy knife or lame slash the highest of the loaf about 1/4-inch deep. If utilizing the elective seeds, brush the highest of the risen bread gently with melted butter, and sprinkle with the seeds.
-
If utilizing a Pullman pan, grease the within of the lid of the pan, and slide it into place on high of the pan.
-
Place the pan on the center rack OR high oven rack (no matter is acceptable in your oven) of the preheated oven.
-
Bake for 45 minutes to 1 hour. If utilizing a Pullman pan, take away the lid after about 40 minutes of baking and return the pan to the oven to complete baking.
-
The loaf is finished when the inner temperature of the bread reaches about 205°F on an instant-read thermometer and a toothpick inserted within the heart comes out largely clear (not moist).
-
The skin will type a thick, brown crust (thinner and fewer brown in the event you’ve used a pullman pan with a lid), and the loaf will sound considerably hole inside once you faucet it firmly however gently along with your forefinger.
-
Take away the loaf from the oven, and permit the bread to chill for about 10 minutes within the pan. Switch the bread from the pan to a wire rack, take away any parchment paper, and permit the loaf to chill fully. Slice the cool loaf into 10 equal slices with a serrated knife.
-
Wrap the cooled loaf and any slices tightly in plastic wrap and retailer at room temperature for as much as 2 days.
-
To freeze this bread, cool fully after which wrap tightly, and freeze. Defrost the entire loaf at room temperature, nonetheless wrapped.
-
You too can slice a cooled loaf and wrap every slice individually, and freeze. Defrost as many slices at a time as you want within the toaster.
My favourite gluten free flour blends are Higher Batter’s authentic mix gluten free flour and Nicole’s Finest multipurpose mix (with 3 teaspoons added xanthan gum). King Arthur Flour’s gluten free bread flour additionally works right here, however makes a barely shorter loaf. Their Measure for Measure mix won’t work. Caputo Fioreglut flour works nicely, however place the moist components within the mixer bowl first or the flour mix will stick an excessive amount of to the bowl.
I do not advocate Bob’s Purple Mill 1-to-1 Gluten Free Baking Flour right here, however I’ve been capable of make a satisfactory loaf including an additional 1 1/2 teaspoons xanthan gum to the dry components.
Cup4Cup modified its method and would not appear to work in addition to it has prior to now, so I do not advocate it. To make your personal mix utilizing one in every of my “mock” recipes, please see the all goal gluten free flour blends web page.
No matter you select, please measure your components by weight, not quantity (cups) for persistently good outcomes.
Prompt yeast
Prompt yeast can also be known as breadmaker or rapid-rise yeast. It is excellent right here. If you wish to use energetic dry yeast, use 10 grams (about 3 teaspoons) as a substitute of 8 grams, and blend it first with among the milk within the recipe. Let it bubble and proof after which add it with the opposite moist components.
Dairy and egg substitution strategies.
For dairy free, attempt an equal quantity of vegan butter within the block type. I like Soften and Miyoko’s Kitchen manufacturers greatest. For nondairy milk, use your favourite sort of unsweetened unflavored milk with the same texture to cow’s milk. I like almond milk. Keep away from fat-free milks.
For egg free, attempt 50 grams of aquafaba, 1 complete Bob’s Purple Mill egg replacer, or 1 complete “chia egg” or “flax egg.”
Stand mixer
To get a easy dough that rises evenly and reliably, you actually need to beat the dough in a stand mixer with the paddle attachment. You too can attempt pulsing in a 7 cup meals processor just a few instances. Some readers have made the dough efficiently by hand with a bowl and spoon, mixing vigorously.
Tailored from the e-book Gluten-Free on a Shoestring: 125 Simple Recipes for Consuming Nicely on the Low-cost Second Version, by Nicole Hunn. Excerpted by association with Da Capo Lifelong, a member of the Perseus Books, LLC, a subsidiary of Hachette Guide Group, Inc. Copyright © 2017.
Serving: 1slice | Energy: 237kcal | Carbohydrates: 39g | Protein: 5g | Fats: 6g | Saturated Fats: 4g | Polyunsaturated Fats: 0.2g | Monounsaturated Fats: 2g | Trans Fats: 0.2g | Ldl cholesterol: 16mg | Sodium: 533mg | Potassium: 110mg | Fiber: 3g | Sugar: 4g | Vitamin A: 199IU | Vitamin C: 0.01mg | Calcium: 48mg | Iron: 0.1mg
Vitamin data is mechanically calculated, so ought to solely be used as an approximation.
FAQs
Listed here are some widespread causes:
• You are not utilizing the proper gf flour mix otherwise you’re not utilizing the correct quantity (you need to measure by weight for correct outcomes);
• When you used energetic dry as a substitute of prompt yeast, you did not use sufficient (you will want 25% extra energetic dry yeast) or did not proof it in among the milk first
• You did not permit sufficient time or the right situations for proofing and/otherwise you killed the yeast by attempting to proof the bread in what you thought was a heat, however not sizzling, oven;
• You did not measure your components by weight, together with water, so the hydration ratio is incorrect.
It is accomplished when the inner temperature of the bread reaches round 205°F on an instant-read thermometer, if not just a little increased. The skin will type a thick, brown crust, and it’ll sound hole once you thump it on the underside along with your thumb or forefinger.
The most typical causes for gluten free bread sinking after cooling embody:
• An excessive amount of proofing; the bread rose increased than it might assist itself. Uncooked gf bread dough tends to tackle a pock-marked look when it is overproofed, so watch fastidiously.
• An excessive amount of yeast, so the bread rose too rapidly and the dough could not assist the rise and nonetheless maintain its form
• An excessive amount of liquid, resulting in too a speedy overproofing, and an excessive amount of liquid to correctly bake off within the oven
• A too-hot oven that baked the surface to burning lengthy earlier than the within of the loaf was cooked by sufficient to assist the construction.
Readers who reside at altitude report that their “common” altitude changes work simply as nicely in my gluten free recipes as they do of their typical recipes. This King Arthur Flour information for prime altitude baking is beneficial.
Strive making it in a 7-cup meals processor, utilizing a plastic blade in case you have it. Pulsing the components simply sufficient to make the dough easy, however not a lot that it heats the dough, which may kill the yeast and even start to cook dinner the components. Some readers have reported having the ability to make the recipe by hand, however the dough won’t be as easy and should not rise as nicely.

make forward/leftovers
Storage directions
Cool fully, then wrap unsliced bread tightly in an hermetic wrap at room temperature, and it’ll final for about 2 days.
Refresh bread that feels a bit stale simply. Moist the slices with lukewarm water and toast it on a really low setting to heat it up and permit the bread to soak up the water.
Freezing
Freeze the entire, cooled loaf with out slicing it. Or slice it absolutely, after which wrap every slice individually in freezer-safe wrap. To slice the loaf after which freeze all of it collectively, add items of parchment paper between slices so they do not stick collectively.
Take away as many slices as you want from the freezer, and refresh them within the toaster. There is not any must defrost them first.

Gluten free bread machine bread
I do not love bread machines, however a lot of you want to use them. This is learn how to make this recipe in a bread machine:
Use complete eggs and oil
As an alternative of two egg whites, because the recipe requires, use 2 complete eggs. As an alternative of 4 tablespoons of melted unsalted butter, use 4 tablespoons (56 grams) further virgin olive oil.
Just one rise
You need to not let your gluten free bread dough rise greater than as soon as in a bread machine. In case your bread machine has a “gluten free setting,” make certain that signifies that it has just one rise. If it has a number of rises, the dough will deflate and be dense.
The settings
- 20 minute relaxation (to ensure that all of your components are on the identical room temperature)
- 20 minute combine (no extra, you do not need to overmix)
- 1 hour rise (any much less, and the bread hasn’t risen absolutely)
- 1.5 hour bake (in case your machine permits you to add baking time (mine would not), then set it to 1.25 hours of baking time and add extra if crucial; in any other case, set it to 1.5 hours and examine for doneness at 1.25 hours)
The strategy
- Whisk collectively the moist components (milk, olive oil, apple cider vinegar, 2 eggs) first, and pour them into the loaf pan
- Whisk collectively the dry components minus the yeast individually (gluten free flour mix, xanthan gum, cream of tartar, granulated sugar), and spoon them in a good layer on high of the moist components within the loaf pan.
- Create a nicely within the heart of the dry components with out exposing the moist, and add the moment yeast
- Begin the cycle; after the machine has practically completed mixing, scrape down the edges of the loaf pan with a silicone spatula in case there are any unmixed dry components
- After the blending cycle is finished, easy the highest with a moist silicone spatula
- After 1.25 of baking time, examine the loaf with an prompt learn thermometer. If it would not learn at leaset 205°F, let the loaf bake till it does.
- When you like a browned high, place the loaf within the oven (in spite of everything that!) for about 10 minutes at 400°F.
Bake absolutely
Your gluten free bread machine bread should learn at the very least 205°F on an prompt learn thermometer. Since a bread machine will not create a crusty bread, it is not going to burn in the event you bake it longer than standard (not like bread baked in an oven). And with out that stiff crust, the crumb of the bread has to carry its form all by itself, so it must be baked to a better inside temperature.
Advisable bread baker
I like to recommend the Zojirushi Residence Bakery Virtuoso Plus Breadmaker, 2 lb. loaf of bread, mannequin BB-PDC20BA. It has a “home made” setting that permits you to management all the things.
Make this recipe as is within the 2 pound loaf pan for a brief loaf, or improve the yield to fifteen slices for a bigger loaf. You’ll want to use 3 eggs as a substitute of three egg whites, and 6 tablespoons of additional virgin olive oil instead of 6 tablespoons of melted butter. You’ll virtually actually want 1.5 hours of bake time with the bigger loaf.