

This home made Black Velvet Cake is so moist and scrumptious with with a tremendous crumb and velvety comfortable texture.
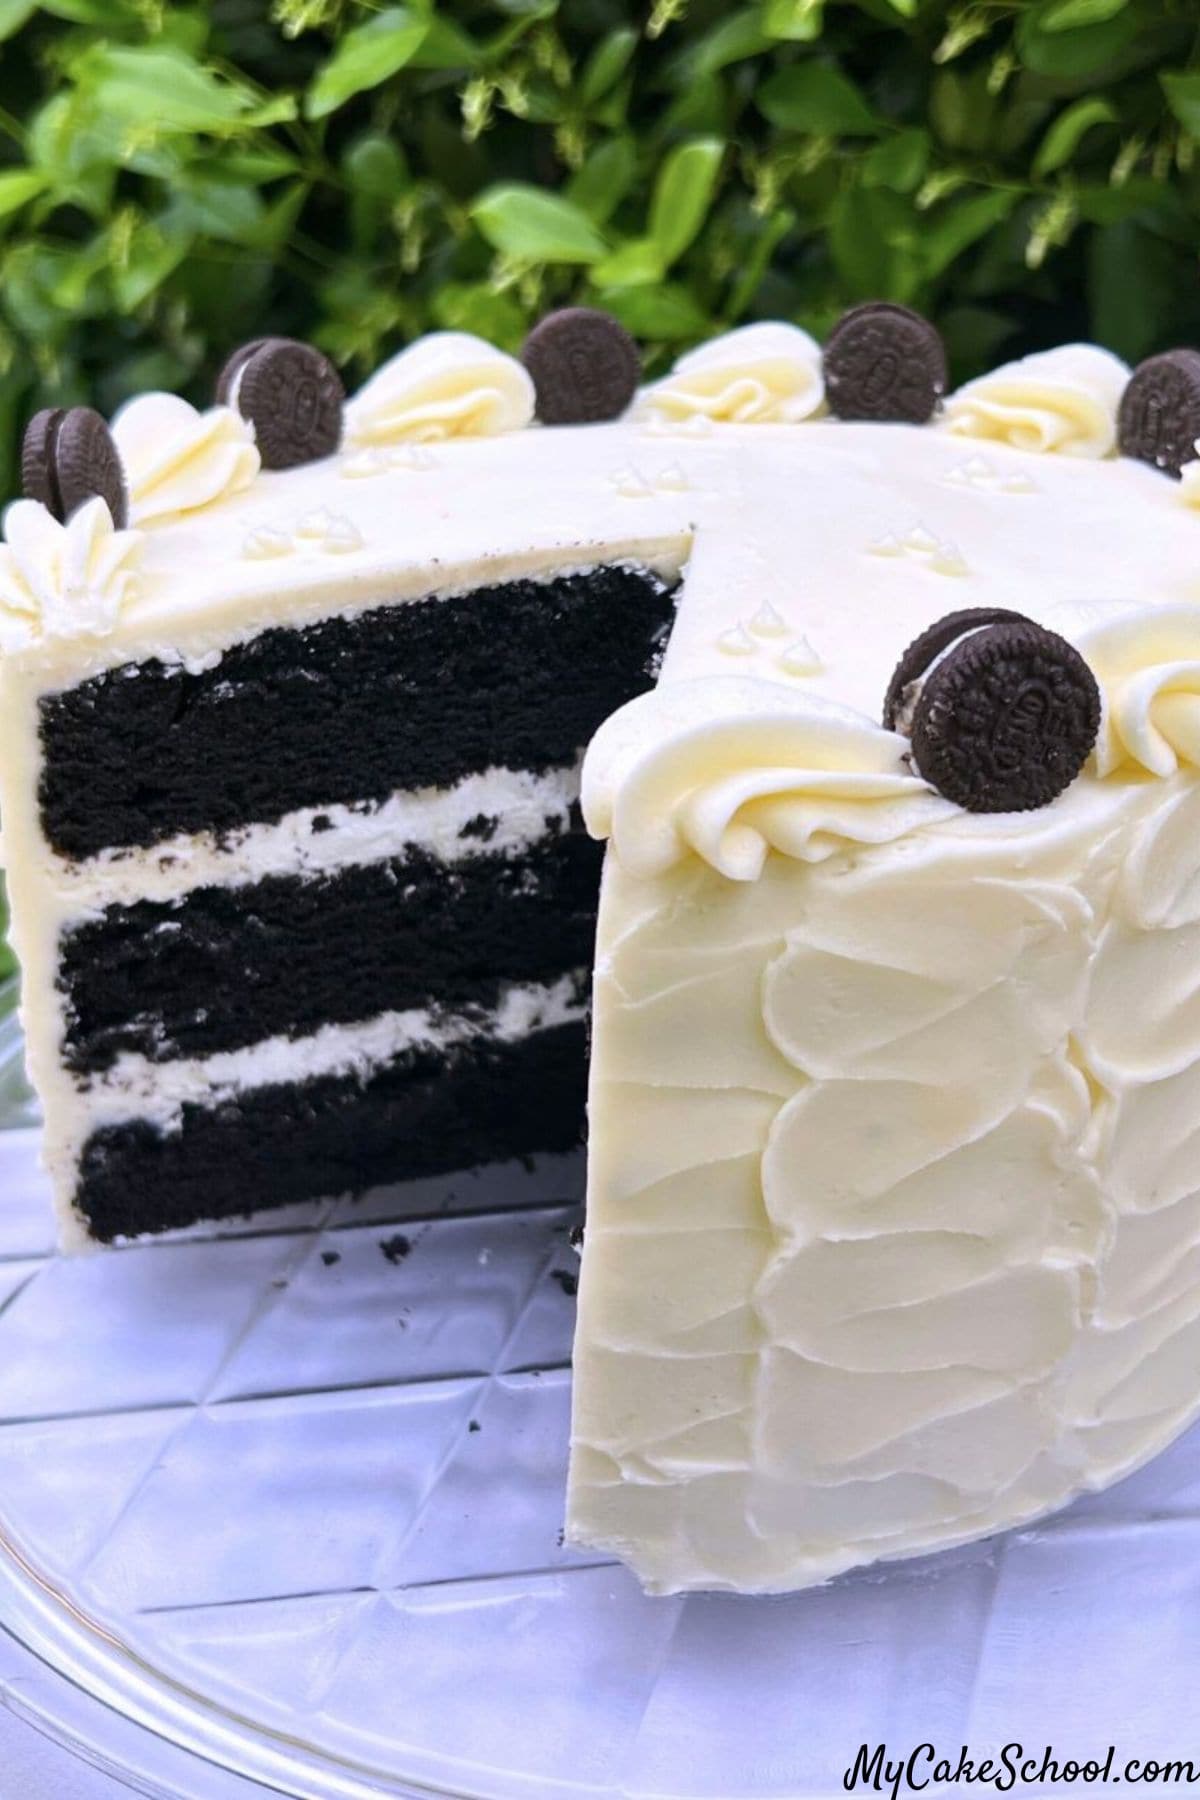
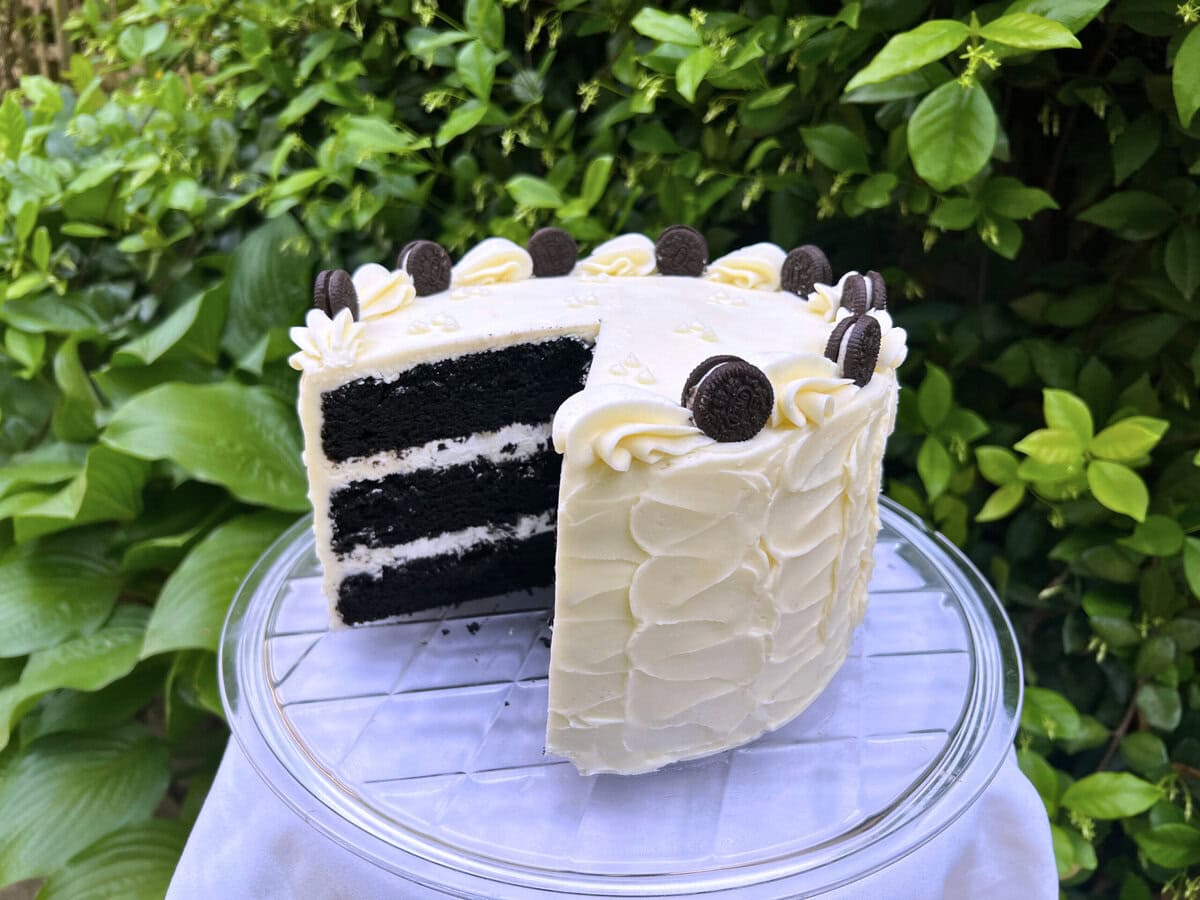
Black Velvet Cake layers are sometimes crammed and frosted with black cocoa buttercream (particularly at Halloween)- however right this moment, we selected a filling of Oreos and cream, and frosted it with vanilla buttercream. This cake is chocolatey and lightweight, and so fairly when sliced!
What’s Black Cocoa Powder?
Black Velvet Cake will get its darkish shade from black cocoa powder reasonably than black coloring.
Black cocoa powder has been ultra-Dutch processed, which reduces its acidity. This leads to a darker shade and smoother, milder, extra mellow taste.
Find out how to Make Black Velvet Cake
Our model of black velvet cake incorporates softened cream cheese within the cake batter. That is considered one of my favourite substances for giving a cake that velvety comfortable high quality (as with our white velvet cake and vanilla velvet cake recipes).
This is a fast have a look at our steps. You will discover the total recipe on the backside of this publish!
- Preheat oven to 350 levels F. Grease and flour three 8 inch spherical pans. (You too can use two 9 inch pans). We additionally place circles of parchment on the underside of our ready pans (non-obligatory).
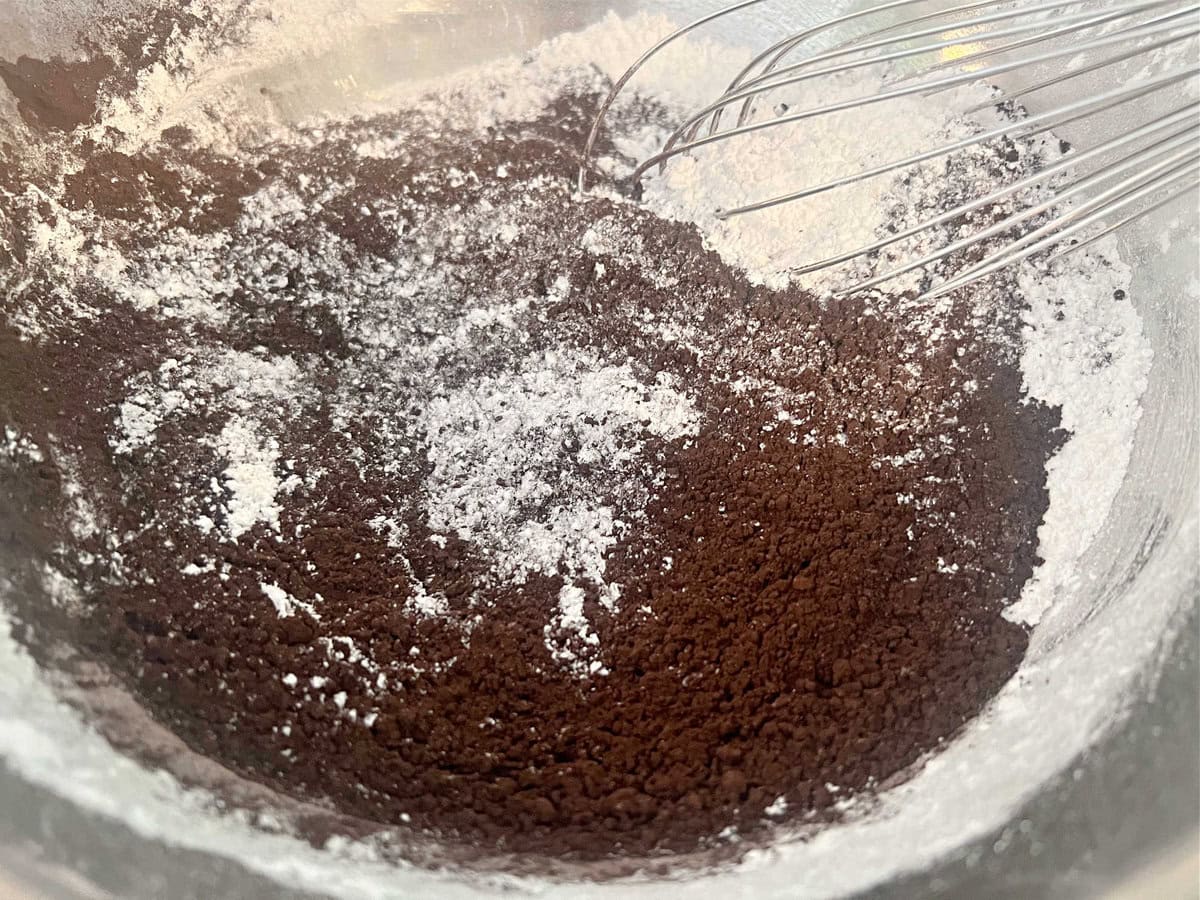
- Flour Combination: In a medium bowl mix the flour, baking powder, baking soda, salt, and black cocoa powder. Whisk for 20 seconds to mix and put aside.
- Milk Combination: In a separate bowl, add the milk, vegetable oil, and vanilla extract. Put aside.
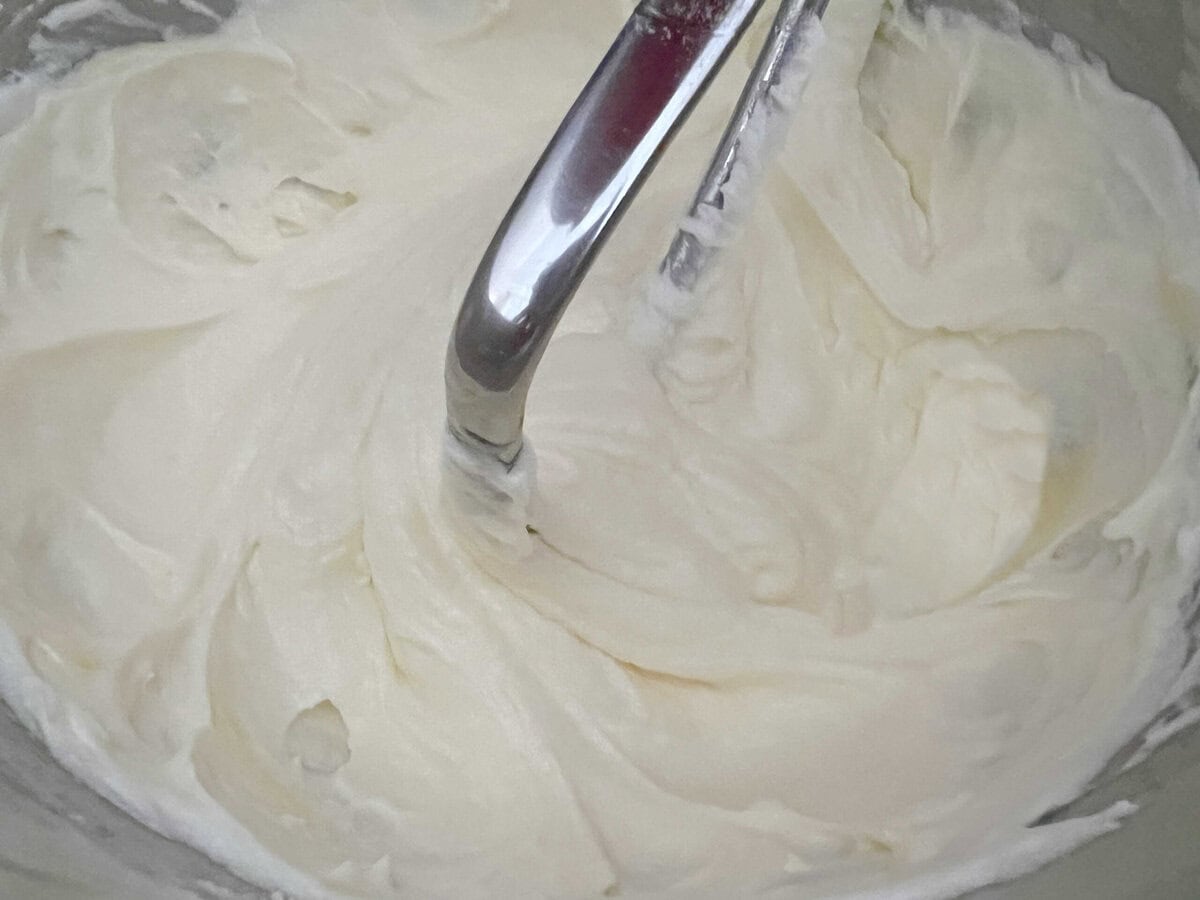
- Within the bowl of an electrical mixer, (utilizing a paddle attachment if utilizing a stand mixer), add the softened butter and softened cream cheese. Combine till clean. Step by step add the sugar. Combine on medium pace for 3 minutes till lightened and fluffy. Scrape the edges and backside of the bowl.
- Add the eggs separately, mixing on low to medium pace after every till the yellow of the yolk has blended.
- Put together the ½ cup of sizzling espresso. (I used immediate espresso dissolved in sizzling water however you should use any form of espresso). When you do not need to use espresso, use sizzling water. Put aside- this would be the final step.
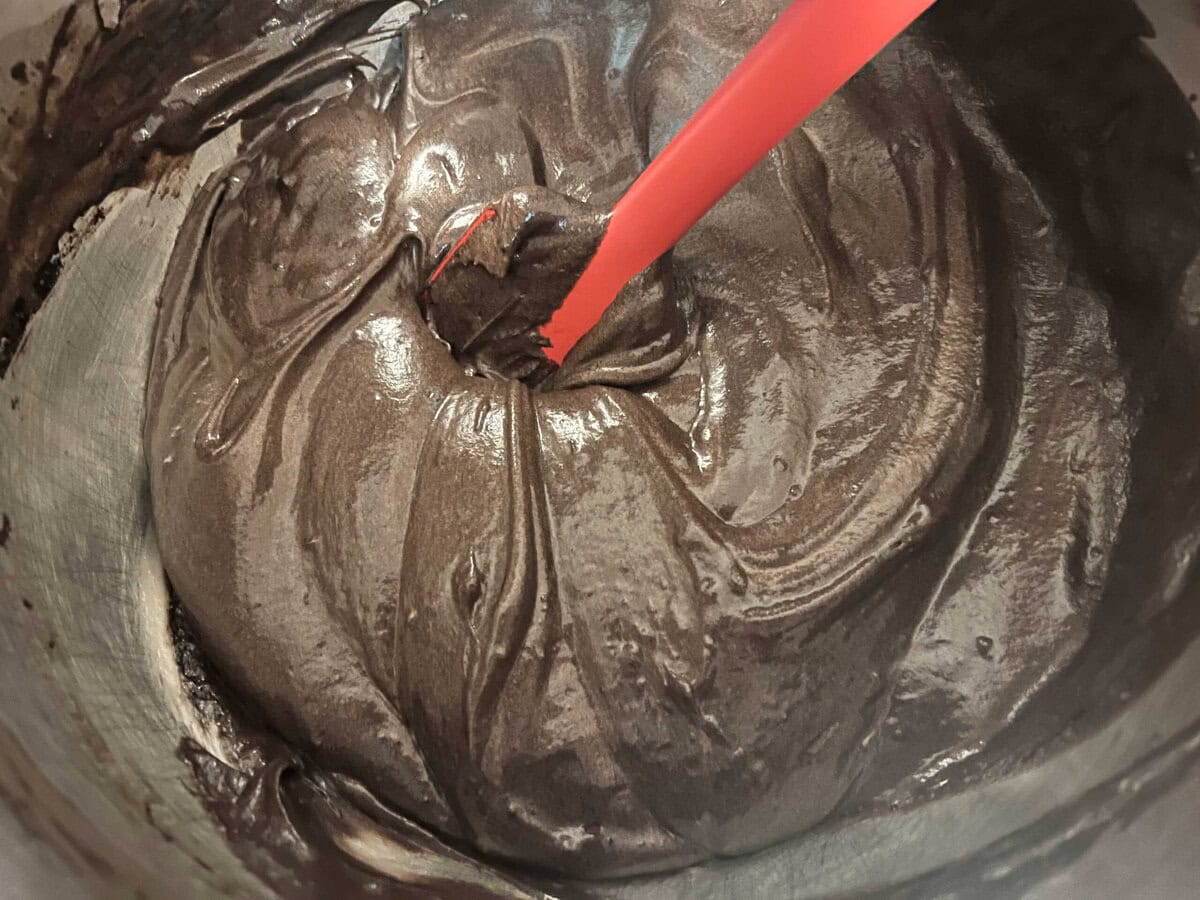
- With the mixer on low pace, ALTERNATELY add the flour combination and milk combination, beginning and ending with the flour combination. We did three additions of flour combination alternating with two additions of milk combination. After the final addition of flour combination, combine till *virtually* fully blended. Then, slowly pour within the sizzling espresso. Combine simply till included (round 15 seconds).
- Add the batter to the three ready pans and bake at 350 levels for 25-Half-hour. (Ours had been executed in 27 minutes).
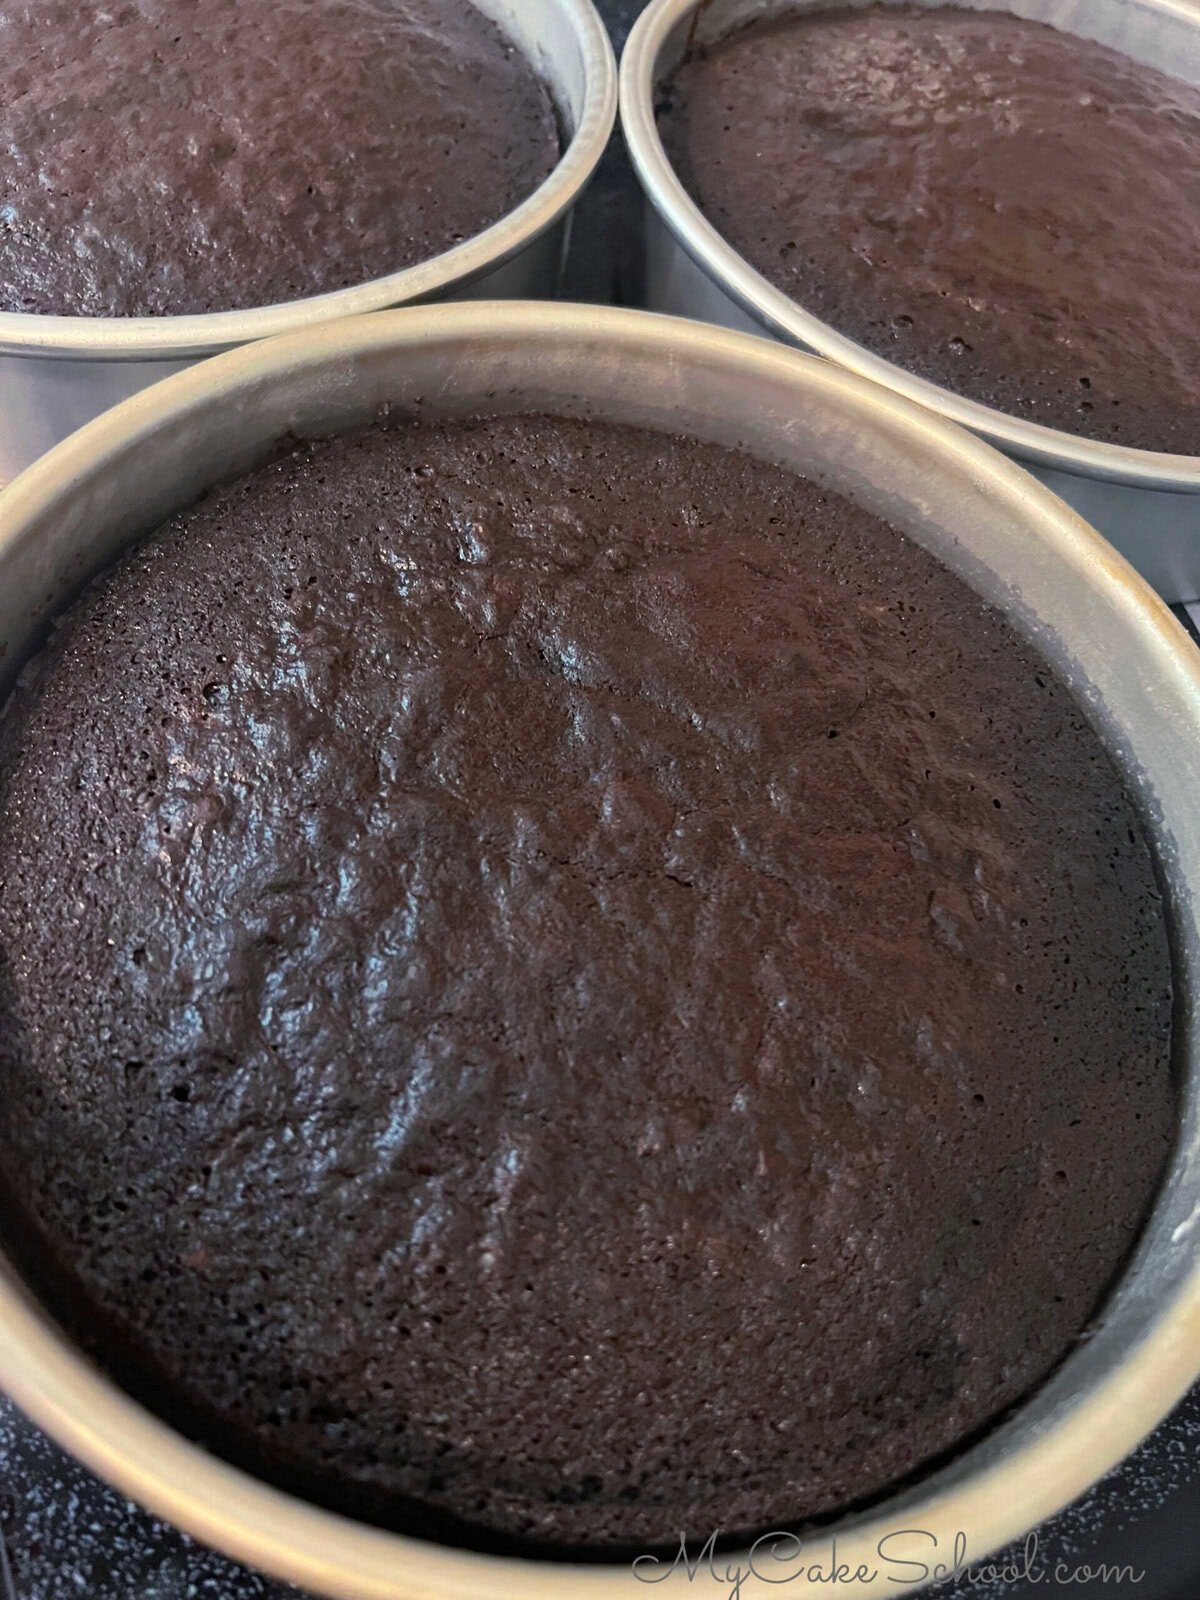
- Cool the pans on cooling rack 5 to 10 minutes then end up.
Assembling the Cake
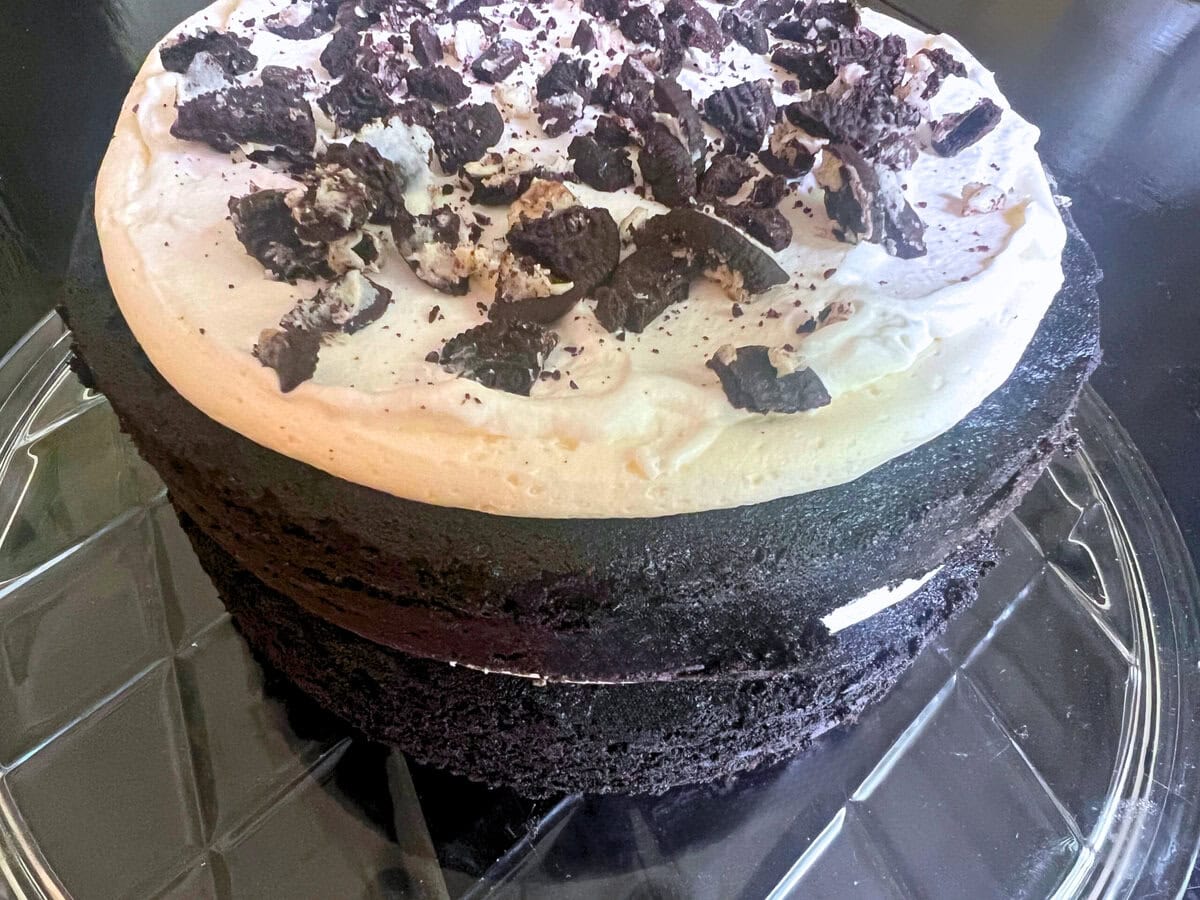
There are various frostings and fillings that might be nice with black velvet cake layers. Immediately, we sandwiched sweetened whipped cream and crushed Oreos between our black velvet layers and frosted the cake in our simple vanilla buttercream.
- As soon as the cake layers have cooled, place the primary layer on the cake plate or pedestal. Pipe a dam of buttercream across the prime fringe of the cake and fill it with the home made whipped cream.
- Prime with crushed Oreos (non-obligatory however beneficial!) ;0). Then, prime with the second cake layer and repeat.
- Prime with the third cake layer, fill in any gaps between layers with buttercream, and apply a skinny crumb coat (skinny coat) of frosting. At this level, we suggest chilling the cake (both within the freezer for quarter-hour, or longer within the fridge) till the frosting is agency.
- Then, apply the second coat of frosting and adorn nonetheless you want! We smoothed across the sides with a bench scraper, and utilized texture with an offset spatula. For the prime border, we alternated between chunky buttercream shells (piped with a 1M tip) and mini Oreos.
Extra Chocolate Muffins
We have made so many chocolate desserts over time! A few of our favorites are our scratch chocolate cake, simple triple chocolate cake, chocolate bitter cream pound cake, and German Chocolate Cake.
For the Cake
-
Preheat oven to 350 levels F. Grease and flour three 8 inch spherical pans. (You too can use two 9 inch pans). We additionally place circles of parchment on the underside of our ready pans (non-obligatory).
-
Flour Combination: In a medium bowl mix the flour, baking powder, baking soda, salt, and black cocoa powder. Whisk for 20 seconds to mix and put aside.
-
Milk Combination: In a separate bowl, add the milk, vegetable oil, and vanilla extract. Put aside.
-
Within the bowl of an electrical mixer, (utilizing a paddle attachment if utilizing a stand mixer), add the softened butter and softened cream cheese. Combine till clean. Step by step add the sugar. Combine on medium pace for 3 minutes till lightened and fluffy. Scrape the edges and backside of the bowl.
-
Add the eggs separately, mixing on low to medium pace after every till the yellow of the yolk has blended.
-
Put together the ½ cup of sizzling espresso. (I used immediate espresso dissolved in sizzling water however you should use any form of espresso). When you do not need to use espresso, use sizzling water. Put aside- this would be the final step.
-
With the mixer on low pace, ALTERNATELY add the flour combination and milk combination, beginning and ending with the flour combination. We did three additions of flour combination alternating with two additions of milk combination. After the final addition of flour combination, combine till *virtually* fully blended. Then, slowly pour within the sizzling espresso. Combine simply till included (round 15 seconds).
-
Add the batter to the three ready pans and bake at 350 levels for 25-Half-hour. (Ours was prepared in 27 minutes). The cake layers are executed when a toothpick inserted into the middle comes out clear or with just some crumbs connected. *Baking instances can differ and so peek in as the tip time approaches.
-
Cool the pans on cooling rack 5 to 10 minutes then end up.
For the Whipped Cream Filling
-
Chill the blending bowl and beaters within the freezer for 10 minutes or fridge for 20 minutes. You should use a hand mixer or stand mixer with the whisk attachment.
-
Pour the heavy cream, powdered sugar and vanilla into the chilled mixing bowl.
-
Start mixing on low pace, progressively rising to medium excessive pace. Combine till the whipped cream thickens to stiff peak stage (that means that whenever you cease the mixer and raise up the beaters, the cream types a peak and holds its form.) This may increasingly take roughly 1-1 ½ minutes. Watch out to not over-mix as it should start to separate (and switch into butter) ;0)
-
Put aside.
For the Vanilla Buttercream
-
Cream the softened butter till clean. Mix within the vanilla.
-
Add half of the powdered sugar and a lot of the milk. Combine at low to medium pace till the powdered sugar is included.
-
Add remaining powdered sugar and milk and blend at medium pace one other 3 to 4 minutes scraping the edges of the bowl often. I decelerate the mixer to very low pace for the final 1 to 2 minutes. This can assist eradicate air pockets within the buttercream. The feel will develop into very clean.
-
In case your buttercream is just too skinny, add extra sugar. If the consistency is just too thick, add a bit extra milk
Assembling the Cake
-
As soon as the cake layers have cooled, place the primary cake layer on the cake plate or pedestal. Pipe a dam of buttercream across the prime fringe of the cake (about ¼-1/2 inch from the sting). You possibly can pipe a dam utilizing a disposable piping bag (or ziplock bag) with the tip snipped away.
-
If you do not have piping baggage, simply preserve your filling a protected distance from the sting of the cake layer in order that it will not creep out when the layers are stacked.
-
Subsequent, unfold a layer of whipped cream throughout the dam of buttercream. Sprinkle crushed Oreos on prime (optional- use nonetheless many you want).
-
Prime with the following cake layer and repeat steps.
-
Prime with the ultimate cake layer. Fill in any gaps between layers with buttercream (I do that with the identical piping bag that I used for the dam). Frost the highest and sides of the cake with a really skinny layer of buttercream. (“crumb coat”).
-
Earlier than including the ultimate coat of frosting, I like to sit back the crumb coated cake within the freezer for quarter-hour or longer within the refrigerator– simply to agency issues up. This makes frosting the cake simpler and traps the crumbs.
-
Apply the ultimate layer of frosting and adorn nonetheless you want! I smoothed my frosting with an offset spatula and bench scraper, after which added a little bit texture with my offset spatula. I used a border of chunky piped shells (1M tip) and mini Oreos.
Storage
-
Due to the whipped cream filling, this cake must be refrigerated (in an hermetic container, below a cake dome, or in a sealed bakery field). Nonetheless, for the most effective taste and particularly texture, take away the cake from the fridge a few hours earlier than serving. This can permit the cake to heat and soften. (Butter will get agency when chilled- and butter is within the cake & frosting). Take pleasure in! ;0)
The cake layers might be wrapped in plastic wrap adopted by foil, and frozen for as much as three months. (Wrap layers individually). Thaw at room temperature, wrapped, for about 20 minutes earlier than unwrapping and bringing to desired temp for adorning.